Yes, you can easily make your own baby cereal at home using simple ingredients like grains and water.
Understanding Baby Cereal
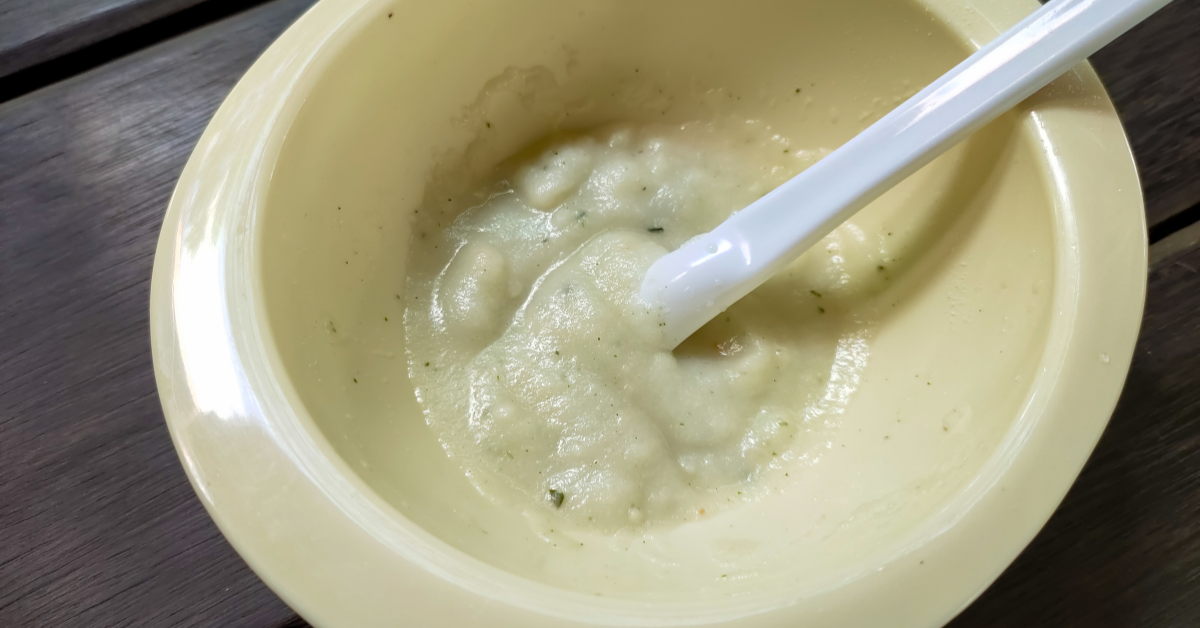
Baby cereal serves as a staple in many infants’ diets, providing essential nutrients needed for growth and development. Typically, these cereals are made from grains like rice, oats, or barley. They are designed to be easy for babies to digest and can be mixed with breast milk or formula to create a smooth texture that is suitable for little ones.
Homemade baby cereal is not only economical but also allows parents to control the ingredients, ensuring that their babies consume wholesome and nutritious food without any added preservatives or artificial flavors. Making your own baby cereal can be a fun and rewarding experience, allowing you to introduce various grains to your child’s diet.
The Benefits of Making Your Own Baby Cereal
Creating your own baby cereal comes with numerous advantages:
- Control Over Ingredients
When you make baby cereal at home, you have full control over what goes into it. This means no added sugars, preservatives, or artificial flavors—just pure, wholesome ingredients. You can choose organic grains and ensure that everything is fresh. - Cost-Effective
Store-bought baby cereals can be costly, especially when you’re buying organic options. By making your own, you save money while providing high-quality nutrition for your baby. - Customizable Flavors
You can easily customize the flavor of homemade baby cereal by adding fruits or vegetables. This helps introduce your child to different tastes early on and encourages healthy eating habits. - Freshness
Homemade cereals are fresher than store-bought varieties. You can prepare small batches that are consumed quickly, ensuring that your baby gets the best possible nutrition without any loss of flavor or nutrients.
Essential Ingredients for Homemade Baby Cereal
The primary ingredients you’ll need for making homemade baby cereal include:
- Grains: Oats, rice, barley, quinoa—these are excellent choices.
- Water or Breast Milk: Used to cook the grains and achieve the desired consistency.
- Optional Add-Ins: Fruits like bananas or applesauce can enhance flavor and nutrition.
Here’s a simple breakdown of some common grains used in homemade baby cereal:
| Grain | Nutritional Benefits | Cooking Time (minutes) |
|---|---|---|
| Rice | Easy to digest; rich in carbohydrates; commonly used as a first grain. | 20-25 |
| Oats | High in fiber; naturally contain iron and other minerals. | 10-15 |
| Barley | Contains fiber and B vitamins; supports digestive variety. | 30-40 |
| Quinoa | Contains protein, iron, and several essential nutrients. | 15-20 |
A Step-by-Step Guide to Making Rice Cereal at Home
Ingredients Needed:
1 cup of brown rice (or white rice)
4 cups of water (or breast milk)
The Process:
- Sift the Rice: Rinse the rice under cold water to remove excess starch. This helps prevent clumping during cooking.
- Cook the Rice: In a saucepan, combine the rinsed rice and water (or breast milk). Bring it to a boil over medium heat.
- Simmer: Once boiling, reduce heat to low and cover the pot. Allow it to simmer for about 20-25 minutes until the rice is tender.
- Puree: Transfer the mixture into a blender or food processor. Blend until smooth. Add more water or breast milk if needed for consistency.
- Cool Down: Let the cereal cool before serving it to your baby.
- Storage: Let the cereal cool, then place it in a clean, airtight container. Refrigerate and use within 24–48 hours. For longer keeping, freeze single-serve portions for up to three months.
A Step-by-Step Guide to Making Oatmeal Cereal at Home
Ingredients Needed:
1 cup of rolled oats (preferably whole grain)
The Process:
- Cook Oats: In a saucepan, combine rolled oats with 2 cups of water or milk (breast milk/formula). Bring it to a boil over medium heat.
- Simmer: Lower the heat and let it simmer while stirring occasionally until thickened (about 5-10 minutes).
- Puree: If desired, transfer cooked oats into a blender for a smoother texture suitable for younger infants. Add more liquid if necessary.
A Step-by-Step Guide to Making Quinoa Cereal at Home
Ingredients Needed:
1 cup of quinoa (rinsed)
The Process:
- Rinse Thoroughly: This step is crucial as it removes saponins that give quinoa a bitter taste.
- Cook Quinoa: Add rinsed quinoa and 2 cups of water into a saucepan. Bring it to a boil over medium heat.
- Simmer: Tightly cover and reduce heat; let it simmer for about 15 minutes until all water is absorbed.
- Puree: If desired, blend cooked quinoa with additional liquid until reaching the desired consistency before serving.
Barley Cereal: A Heart-Healthy Option
Ingredients
- ½ cup pearl barley
- 2 cups water or unsalted broth
Method
- Rinse barley; simmer 25-30 minutes until tender.
- Transfer with cooking liquid to a blender; purée until silky.
- Thin with breast milk, then cool to body temperature.
Barley contains beta-glucan fiber and adds variety to a baby’s grain intake. If rice seems constipating for your baby, rotating in other grains may be helpful.
Grain Snapshot: Nutrients & Safety Points
| Grain | Stand-Out Nutrition Point | Safety / Tolerance Note |
|---|---|---|
| Rice | Gentle texture; easy to thin for beginners | Best used in rotation with other grains rather than as the only cereal. |
| Oats | Fiber-rich and naturally contains iron | Choose certified gluten-free oats if cross-contact with wheat is a concern. |
| Barley | Provides fiber and helpful grain variety | Contains gluten, so introduce carefully if gluten tolerance is a concern. |
| Quinoa | Contains protein, iron, and several minerals | Rinse well to remove bitter saponins before cooking. |
| Millet | Mild flavor and soft texture when cooked | Works well as part of a varied grain rotation. |
| Buckwheat | Naturally gluten-free pseudocereal with minerals | Puree thoroughly for younger babies. |
| Amaranth | Contains iron and other nutrients | Tiny seeds can thicken quickly, so blend well for early eaters. |
Additions and Variations for Flavoring Your Baby Cereal
Once you’ve mastered basic cereals like rice or oatmeal, consider adding some flavor enhancements:
- Pureed Fruits: Add applesauce, mashed bananas, or pureed pears directly into the cereal after cooking for natural sweetness and nutrition.
- Pureed Vegetables: Mix in pureed carrots or sweet potatoes for added vitamins and minerals without sacrificing taste.
- Cinnamon or Nutmeg: A tiny pinch can enhance flavor—just be cautious with quantities and introduce new ingredients gradually.
These additions not only make cereals tastier but also introduce diverse nutrients beneficial for your baby’s growth.
Nutritional Considerations When Making Baby Cereal at Home
While making homemade baby cereal allows you control over ingredients, it’s essential also to consider nutritional balance:
- Iron Content: Iron matters a great deal in late infancy. CDC guidance on iron for infants explains that around 6 months, babies need iron-rich foods to help meet their nutritional needs. Because homemade cereals are usually not iron-fortified like many commercial infant cereals, pairing grains with other iron-rich foods and vitamin C-rich fruits can be especially helpful.
- Diversity: Avoid sticking solely with one grain. Introduce various types gradually—this not only keeps meals interesting but also supports a broader nutrient intake.
Remember that babies have different dietary needs as they grow older. Consult your pediatrician regarding introducing solid foods alongside cereals after about six months, based on your child’s readiness.
Safety and Quality Tips: Arsenic, Allergens, and Grain Sourcing
Parents worry—rightly—about contaminants and intolerance. A few easy habits keep homemade cereals both safe and gut-friendly.
- Rotate Your Grains: Rice can contain more inorganic arsenic than many other grains, which is one reason experts often encourage variety. The FDA’s infant rice cereal arsenic guidance is why many parents choose not to rely on rice cereal alone every day.
- Buy From Trusted Brands: Choose grains from reputable manufacturers and stores, and check packaging for freshness and proper sealing.
- Watch for Gluten-Containing Grains: Grains such as barley and wheat can be introduced as solids are started, but add one new food at a time and monitor for rash, diarrhea, vomiting, or wheezing.
- Store Carefully: Keep dry grains in a cool, dry place. Once cooked, refrigerate homemade cereal promptly and use it within the recommended window.
- Use Variety for Balance: Rotating oats, quinoa, barley, and other grains can broaden flavor exposure and reduce dependence on a single grain source.
Serving Milestones and Portion Guidance by Age
| Age | Dry-Grain Measure per Meal | Texture Cue |
|---|---|---|
| 6 – 7 mo | 1 tbsp (makes about 2-3 tbsp cooked) | Almost pourable; very smooth |
| 8 – 9 mo | 2 tbsp | Thick purée; tiny soft grain flecks may be fine |
| 10 – 12 mo | 3-4 tbsp | Pudding-like with soft grains for chewing practice |
Offer cereal once daily at first, then more often if it fits your baby’s appetite and overall diet. Follow your baby’s hunger cues and stop when lips purse, the head turns away, or interest fades.
Tips for Serving Homemade Baby Cereals Safely
Safety should always come first when feeding babies new foods! Here are some tips:
- Smooth Consistency: Always ensure cereals are blended smoothly before serving—this helps reduce choking risk for younger babies.
- Temperature Check: Make sure food isn’t too hot before feeding. Test on your wrist first.
- Introduce Gradually: When introducing new flavors, start small. Observe reactions over several days before adding more varieties.
These precautions will help ensure mealtime remains safe and enjoyable.
The Importance of Introducing Solid Foods Alongside Cereals
As babies grow older—usually around six months—they begin transitioning from liquids alone toward solids. While cereals provide an excellent starting point, they shouldn’t be the sole source of nourishment.
Introduce various fruits, vegetables, and other age-appropriate foods gradually alongside cereals. This helps develop palate preferences and supports balanced nutrition overall.
Consult pediatricians regarding specific timelines tailored to individual child needs.
Key Takeaways: Homemade Baby Cereal
➤ Control Over Ingredients: Make cereals without added sugars or preservatives.
➤ Cost-Effective: Save money by preparing your own nutritious baby cereals.
➤ Customizable Flavors: Easily add fruits or vegetables for unique tastes.
➤ Freshness Guaranteed: Homemade cereals are fresher than many store-bought options.
➤ Nutritional Balance: Ensure diverse grains for broader nutrient intake.
Frequently Asked Questions: Homemade Baby Cereal
Can you make homemade baby cereal using different grains?
Yes, you can make homemade baby cereal using various grains. Popular choices include rice, oats, barley, and quinoa. Each grain has unique nutritional benefits. For instance, quinoa contains protein while oats provide fiber and iron. Experimenting with different grains can provide a diverse nutrient profile for your baby.
What are the best practices for storing homemade baby cereal?
Homemade baby cereal should be stored in an airtight container to maintain freshness. Refrigerate leftovers and consume them within 24–48 hours. For longer storage, consider freezing portions in ice cube trays. This allows for easy thawing and portion control when feeding your baby.
How can I ensure the safety of homemade baby cereal?
To ensure safety, always blend the cereal to a smooth consistency to reduce choking risk. Check the temperature before serving to avoid burns. Introduce new flavors gradually, monitoring for any allergic or digestive reactions over a few days before increasing variety.
What nutritional considerations should I keep in mind when making baby cereal?
When making homemade baby cereal, consider iron content since it’s essential during infancy. Pair non-fortified grains with vitamin C-rich foods like fruits to support iron absorption. Additionally, aim for variety in grains to provide comprehensive nutrition and avoid relying too heavily on one cereal type.
How can I enhance the flavor of homemade baby cereal?
You can enhance the flavor of homemade baby cereal by adding pureed fruits or vegetables after cooking. Options like applesauce or mashed bananas add natural sweetness and nutrition. Mild spices such as cinnamon can also be used sparingly once your baby is tolerating individual foods well.
Conclusion: Can You Make Your Own Baby Cereal?
Homemade baby cereal puts you in charge of freshness, nutrition, and flavor. By rotating safe grains and pairing them with fruits or vegetables, you can serve balanced meals that grow with your child’s needs. Keep batches small, store them correctly, and watch how quickly your little one explores new tastes and textures.
If questions arise—about allergens, portion sizes, iron intake, or timing—check in with your pediatrician. A few simple habits today can help set the stage for confident, healthy eating.
References & Sources
- Centers for Disease Control and Prevention (CDC). “Iron | Infant and Toddler Nutrition.” Supports the guidance that infants need iron-rich foods around 6 months and helps explain why homemade cereals are not nutritionally identical to iron-fortified commercial options.
- U.S. Food and Drug Administration (FDA). “Supporting Document for Action Level for Inorganic Arsenic in Rice Cereals for Infants.” Supports the safety note about inorganic arsenic in infant rice cereal and the recommendation to avoid relying on rice as the only grain.